
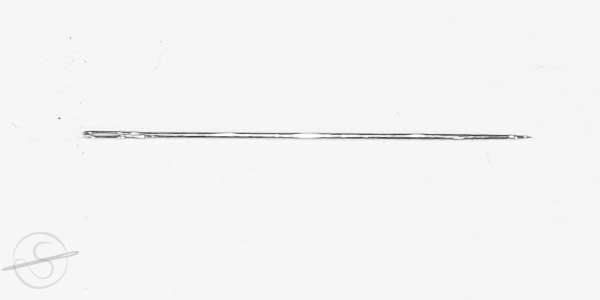
Needles are the most important tool for anyone who wants to decorate a base fabric with thread. The diversity of needles is quite large and requires some knowledge when choosing. We’ll help you get started.
A course participant once said after receiving the “initial equipment”:
I actually wanted to learn embroidery, not acupuncture…
The type of embroidery needle is just as important in embroidery as it is for acupuncture, whether by hand or by machine. We only give instructions for hand embroidery here. A lot of knowledge about choosing the right embroidery needle is also imparted in the courses of the International School for Textile Arts .
However, both techniques have one thing in common: every embroidery needle has its expiry date! Needles used to be a luxury item, hard to come by and expensive to pay for. There were tools to sharpen needles and make them “run better” again: emery pads. Today, those emery pads are more expensive than lots and lots of new embroidery needles. So always treat yourself to new needles, especially if you work a lot on plain-weave, i.e. base fabric that is very tightly woven. This protects your hand muscles and your nerves!
Basic rule for numbering embroidery needles:
- the higher the number, the finer the needle
The numbering is no longer entirely understandable today, but it is as much a part of tradition as everything to do with needle manufacture. 30% of the work is still done partially manually with quality needles.
- examples
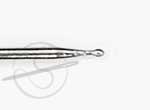
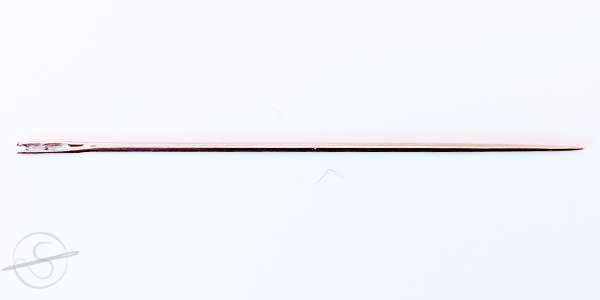
- Breaking apart at the head of the needles pulled in pairs
- Round cut at the eye of the needle
Machinery hasn’t changed much in 300 years, and there’s still a loss of about 15% on each production run.
Only from this tradition can it also be understood that there are still embroidery needles in all conventional sizes available today, although the embroidery needle no. 8 is the same as the embroidery needle no. 9… – some just swear by it to No. 8, the others to No. 9. The numbering only follows a slightly different logic for the darning needles.
Basic rule for choosing embroidery needles:
usually depends on the thread, not on the fabric on which it is stitched!
- The thread must be easy to thread into the eye
- there must still be some leeway for the thread in the eye
- the hole that the needle prepares in the fabric should be large enough to allow the thread to be pulled through easily without touching the embroidery material intensively
- but: again, not so big that the thread wobbles around in it
If you work correctly, even the finest fabric can be worked with a very thick needle, e.g. B. in wool or ribbon embroidery.
Basic rule for choosing the type of needle
- base fabric
- needlework technique

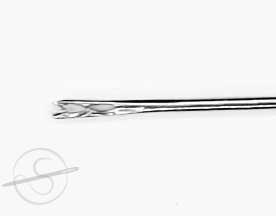
The famous strawberry needlebrushes from the Royal School of Needlework
Basic rule for the basic techniques
- thread-bound (counted) embroidery techniques – basic fabric: canvas = all countable fabrics = all even-weaves
- needle without a point (= round or blunt point)
only the areas where the fabric thread has to be pierced are worked with a sharp needle
-
-
- Example: Borders
in the case of coarse, soft base fabrics, a needle without a point can also be used to pierce the fabric thread
Example: Hardanger fabrics
- Example: Borders
-
- non-threaded (free) embroidery techniques – base fabric: plain-weave (surface linen) = all non-countable fabrics
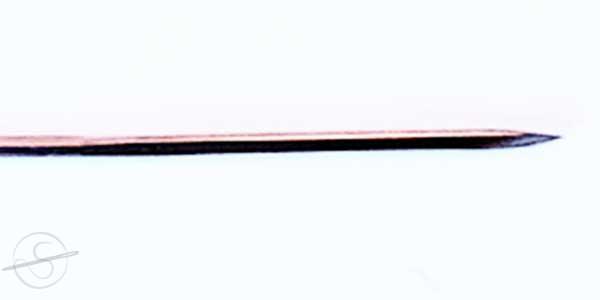
- Pointed needle
a needle without a point is used here only in those areas where the fabric does not need to be pierced
Example: woven stitches
- Pointed needle
General explanations
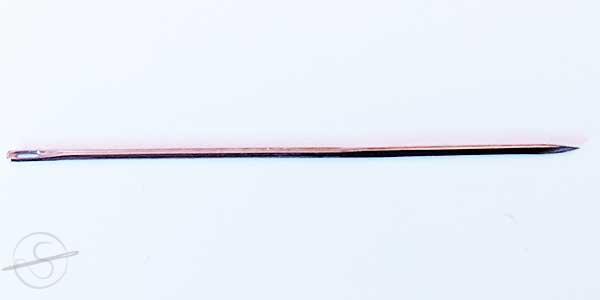
- needle shape
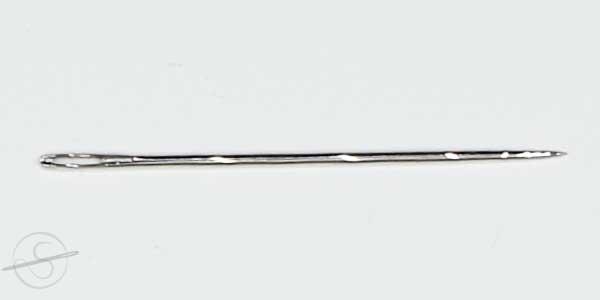
- straight shape: the eye is as wide as the needle shaft
- oval shape: the eye is wider than the shaft of the needle
- eye shape
- long eye: the eye is long and evenly wide
- oval eye: long eye, wider towards the middle and narrower towards the tip
- round eye: well, just round…saves the thread
- needle type
- needle shape
- Used for...
- available sizes
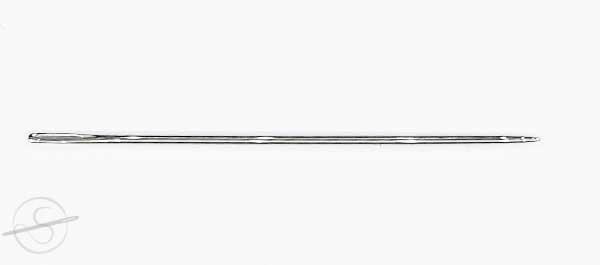
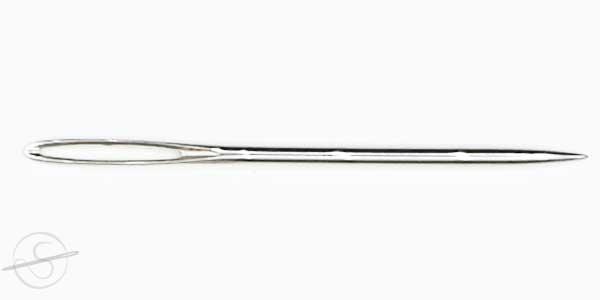
Tapestry embroidery needle
Needle: straight
eye:
- elongated
- straight
Tip: blunt
Fabric: Canvas (all even-weaves)
threads (examples):
- strandable threads
- Cotton á Broder
- Flower thread
- linen thread
- fine pearl threads
- Crewel Wool
- sewing thread
- lace silk
- fine braided threads
- Metallics
- 3
- 5
- 7
- needle type
- needle shape
- Used for...
- available sizes
Ball point embroidery needles
Needle: straight
Eye: elongated, straight
Tip: ball head
fabrics:
- Canvas (all even-weaves)
- plain weaves (for woven stitches)
threads (examples):
- strandable threads
- Cotton á Broder
- Flower thread
- linen thread
- fine pearl threads
- Crewel Wool
- sewing thread
- lace silk
- braided threads
- Metallics
- 22
- 24
- 25
- 26
- 27
- 28

- needle type
- needle shape
- Used for...
- available sizes
tapestry needle
Needle: oval
eye:
- elongated
- oval
Tip: blunt
fabrics:
- Canvas (all even-weaves)
- plain weaves (for woven stitches)
threads (examples):
- strandable threads
- Soft Cotton
- strong pearl threads
- chenille
- Raffia
- bouclette
- tapestry wool
- Crewel Wool
- ribbon
- braided threads
- paper yarn
- Raffia
- 13
- 14
- 16
- 18
- 20
- 22
- 24
- 26
- 28
- needle type
- needle shape
- Used for...
- available sizes
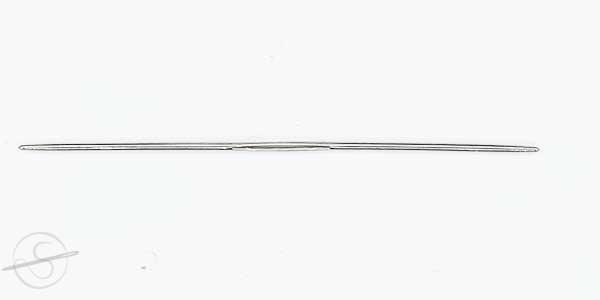
Two-pointed tapestry needle
Needle: oval
eye:
- elongated
- oval
Tip: blunt
fabrics:
- Canvas (all even-weaves)
- plain weaves (for woven stitches)
threads (examples):
- strandable threads
- Soft Cotton
- strong pearl threads
- chenille
- Raffia
- bouclette
- tapestry wool
- Crewel Wool
- ribbon
- braided threads
- paper yarn
- Raffia
- 13
- 14
- 16
- 18
- 20
- 22
- 24
- 26
- 28
- needle type
- needle shape
- Used for...
- available sizes
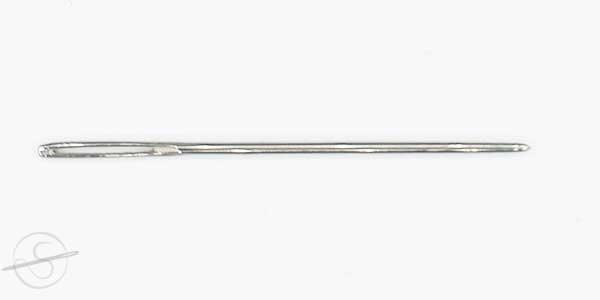
Easy Threading (Blind) Needle
left: with lace
Center: without tip
Needle: oblong
eye:
- elongated
- slightly oval
- double
- slit (kalyx)
Tip: blunt
fabrics:
- without blunt point: canvas (all ceven-weaves)
- with sharp point: all plain-weaves
threads (examples):
- strandable threads
- Cotton á Broder
- Flower thread
- linen thread
- fine pearl threads
- Crewel Wool
- sewing thread
- lace silk
- fine braided threads
- Metallics
- 22 (blunt)
- 24 (blunt)
- 26(blunt)
- 28(blunt)
- 4 (sharp pointed)
- 6 (sharp pointed)
- 8 (sharp pointed)
- needle type
- needle shape
- Used for...
- available sizes
chenille needles
Needle: straight
eye:
- elongated
- straight
Tip: sharp pointed
fabrics:
- all plain-weaves
threads (examples):
- strandable threads
- Soft Cotton
- strong pearl threads
- chenille
- Raffia
- bouclette
- tapestry wool
- Crewel Wool
- ribbon
- braided threads
- paper yarn
- Raffia
- 13
- 14
- 16
- 18
- 20
- 22
- 24
- 26
- needle type
- needle shape
- Used for...
- available sizes
Long beading needle
Needle: oval
eye:
- elongated
- straight
Tip: sharp pointed
fabrics:
- all plain-weaves
- beadwork
threads (examples):
- strandable threads
- Cotton á Broder
- Flower thread
- linen thread
- fine pearl threads
- Crewel Wool
- sewing thread
- lace threads
- braided metallics
- Metallics Twist
- 10
- 12
- 13
- 15
- 16

- needle type
- needle shape
- Used for...
- available sizes
Short beading needle
left: without tip
right: with lace
Needle: oval
eye:
- elongated
- straight
Tip:
Tapestry: blunt point
Chenille: sharp pointed
fabrics:
- Chenille: all plain-weaves
- Tapestry:
- fine linen
- silk gauze
threads (examples):
- strandable threads
- Cotton á Broder
- Flower thread
- linen thread
- fine pearl threads
- Crewel Wool
- sewing thread
- lace threads
- braided metallics
- Metallics Twist
- 10
- 12

- needle type
- needle shape
- Used for...
- available sizes
darning needle
left: regular
right: long
Needle: straight
eye:
- elongated
- straight
Tip: sharp point
fabrics:
- all plain-weaves
threads (examples):
- strandable threads
- Soft Cotton
- Cotton á Broder
- Flower thread
- linen thread
- pearl threads
- Wool
- sewing thread
- lace silk
- braided metallics
- ribbon
- Braided Cotton
- Braided Rayon
- Raffia
- paper yarn
- 1
- 3
- 5
- 7
- 9
- 14 (short version only)
- 15 (short version only)
- 16
- 17
- 18 (short version only)

- needle type
- needle shape
- Used for...
- available sizes
sewing needle
Needle: straight
eye:
- short
- elongated
Tip: sharp pointed
fabrics:
- all plain-weaves
threads (examples):
- strandable threads
- Cotton á Broder
- Flower thread
- sewing thread
- lace thread
- quilting yarn
- 1
- 2
- 3
- 4
- 5
- 7
- 9
- 10
- 11
- 12

- needle type
- needle shape
- Used for...
- available sizes
quilting needle
Needle: straight
eye:
- short
- elongated
Tip: sharp pointed
fabrics:
- all plain-weaves
threads (examples):
- strandable threads
- Cotton á Broder
- Flower thread
- sewing thread
- lace thread
- quilting yarn
- 5
- 7
- 10
- 11
- 12
- needle type
- needle shape
- Used for...
- available sizes
Big Eye quilting needle
Needle: straight
eye:
- elongated
- straight
Tip: sharp pointed
fabrics:
- all plain-weaves
threads (examples):
- strandable threads
- Cotton á Broder
- Flower thread
- sewing thread
- lace thread
- quilting yarn
- 5
- 7
- 10
- 11
- 12
- needle type
- needle shape
- Used for...
- available sizes
Leather needle
Needle: straight
eye:
- round
Tip:
- pointed
- triangular
fabrics:
- all plain-weaves
threads (examples):
- strandable threads
- Cotton á Broder
- Flower thread
- sewing thread
- lace thread
- quilting yarn
- 3
- 5
- 7
- needle type
- needle shape
- Used for...
- available sizes
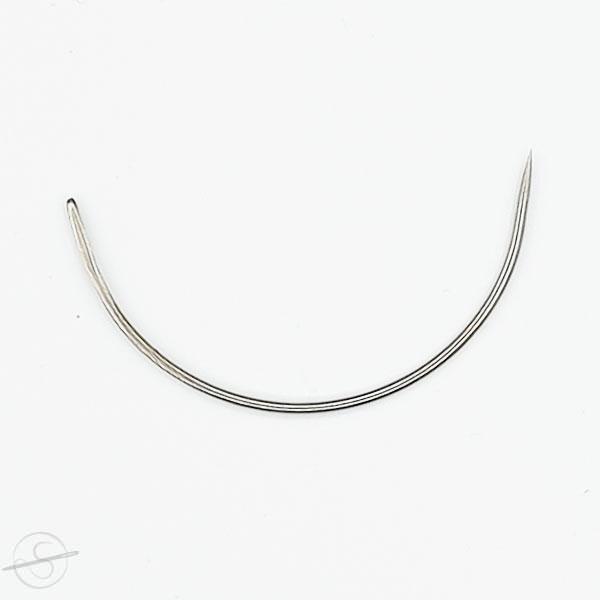
round needle – sharp pointed
Needle: curved
eye:
- round
Tip:
- pointed
fabrics:
- all plain-weaves
threads (examples):
- strandable threads
- Cotton á Broder
- Flower thread
- linen thread
- fine pearl threads
- Crewel Wool
- sewing thread
- lace silk
- braided metallics
- L
- M
- S
- 10 (beads)
- needle type
- needle shape
- Used for...
- available sizes
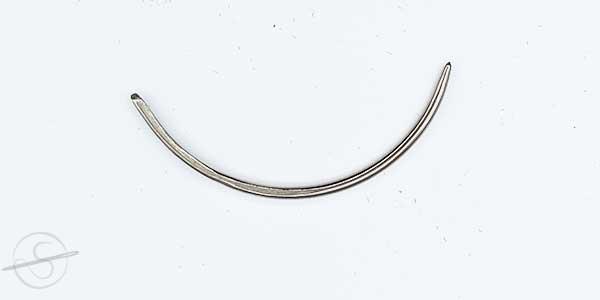
round needle – blunt
Needle: curved
eye:
- elongated
Tip:
- blunt
fabrics:
- Canvas (all even-weaves)
threads (examples):
- strandable threads
- Soft Cotton
- strong pearl threads
- chenille
- Raffia
- bouclette
- tapestry wool
- Crewel Wool
- ribbon
- braided metallics
- Braided Cotton
- Braided Rayon
- paper yarn
- sewing thread
- lace silk
- braided metallics
- flat
- 16
- 18
- round
- 16
- 18
- 20
- 22
- 24
size comparison
Designation | needle shape | eye shape | Lace | strength | Length(mm) | Diameter(mm) |
|---|---|---|---|---|---|---|
| Chenille needle | oval | elongated oval | pointed | 13 | 69 | 2.34 |
| Chenille needle | oval | elongated oval | pointed | 14 | 58 | 2.03 |
| Chenille needle | oval | elongated oval | pointed | 16 | 52.5 | 1.63 |
| Chenille needle | oval | elongated oval | pointed | 18 | 48.5 | 1.27 |
| Chenille needle | oval | elongated oval | pointed | 20 | 44 | 1.09 |
| Chenille needle | oval | elongated oval | pointed | 22 | 40.5 | 0.94 |
| Chenille needle | oval | elongated oval | pointed | 24 | 37 | 0.76 |
| Chenille needle | oval | elongated oval | pointed | 26 | 32.5 | 0.63 |
| Beading needle | straight | elongated straight | pointed | 10 | 55 | 0.45 |
| Beading needle | straight | elongated straight | pointed | 12 | 51 | 0.36 |
| Beading needle | straight | elongated straight | pointed | 13 | 49 | 0.3 |
| Beading needle | straight | elongated straight | pointed | 15 | 45 | 0.25 |
| Beading needle | straight | elongated straight | pointed | 16 | 45 | 0.21 |
| Short beading needle | straight | elongated straight | pointed | 10 | 32.5 | 0.46 |
| Short beading needle | straight | elongated straight | pointed | 12 | 32.5 | 0.36 |
| Tapestry bead needle | straight | elongated oval | blunt | 10 | 32.5 | 0.46 |
| Tapestry bead needle | straight | elongated oval | blunt | 12 | 32.5 | 32.5 |
| Sharps | straight | elongated straight | pointed | 2 | 44 | 0.86 |
| Sharps | straight | elongated straight | pointed | 4 | 40 | 0.76 |
| Sharps | straight | elongated straight | pointed | 11 | 31 | 0.46 |
| Sharps | straight | elongated straight | pointed | 12 | 2.5 | 0.41 |
| quilting needle | straight | elongated straight | pointed | 11 | 22.5 | 0.53 |
| quilting needle | straight | elongated straight | pointed | 12 | 22.5 | 0.41 |
| Big Eye quilting needle | straight | elongated straight | pointed | 10 | 25.5 | 0.53 |
| Big Eye quilting needle | straight | elongated straight | pointed | 11 | 22.5 | 0.53 |
| Embroidery needle | straight | elongated straight | pointed | 1 | 48.5 | 1.02 |
| Embroidery needle | straight | elongated straight | pointed | 3 | 45 | 0.86 |
| Embroidery needle | straight | elongated straight | pointed | 5 | 41.5 | 0.76 |
| Embroidery needle | straight | elongated straight | pointed | 7 | 37 | 0.69 |
| Embroidery needle | straight | elongated straight | pointed | 9 | 34 | 0.61 |
| Embroidery needle | straight | elongated straight | pointed | 10 | 32.5 | 0.53 |
| darning needle | straight | elongated straight | pointed | 5 | 49 | 0.49 |
| darning needle | straight | elongated straight | pointed | 7 | 47 | 0.69 |
| darning needle | straight | elongated straight | pointed | 9 | 45 | 0.61 |
| Long darning needle | straight | elongated straight | pointed | 7 | 58 | 0.69 |
| Long darning needle | straight | elongated straight | pointed | 9 | 52 | 0.61 |
| Tapestry needle | oval | elongated oval | blunt | 13 | 69 | 2.34 |
| Tapestry needle | oval | elongated oval | blunt | 14 | 58 | 2.03 |
| Tapestry needle | oval | elongated oval | blunt | 16 | 52.5 | 1.63 |
| Tapestry needle | oval | elongated oval | blunt | 18 | 48.5 | 1.27 |
| Tapestry needle | oval | elongated oval | blunt | 20 | 44 | 1.09 |
| Tapestry needle | oval | elongated oval | blunt | 22 | 40.5 | 0.94 |
| Tapestry needle | oval | elongated oval | blunt | 24 | 37 | 0.76 |
| Tapestry needle | oval | elongated oval | blunt | 26 | 34 | 0.61 |
| Tapestry needle | oval | elongated oval | blunt | 28 | 32.5 | 0.63 |
| Petites tapestry needle | oval | elongated oval | blunt | 22 | 31.5 | 0.94 |
| Petites tapestry needle | oval | elongated oval | blunt | 24 | 30.5 | 0.76 |
| Petites tapestry needle | oval | elongated oval | blunt | 26 | 27 | 0.61 |
| Petites tapestry needle | oval | elongated oval | blunt | 28 | 26 | 0.53 |
| Two pointed tapestry needle | oval | elongated oval | blunt | 22 | 55 | 0.94 |
| Two pointed tapestry needle | oval | elongated oval | blunt | 24 | 54 | 0.76 |
| Two pointed tapestry needle | oval | elongated oval | blunt | 26 | 50 | 0.61 |
| Two pointed tapestry needle | oval | elongated oval | blunt | 28 | 60 | 0.53 |
| Easy Threading Tapestry Needle | straight | Goblet shape | blunt | 22 | 40 | 0.94 |
| Easy Threading Tapestry Needle | straight | Goblet shape | blunt | 24 | 37 | 0.76 |
| Easy Threading Tapestry Needle | straight | Goblet shape | blunt | 26 | 34 | 0.61 |
| Easy Threading Tapestry Needle | straight | Goblet shape | blunt | 28 | 32 | 0.53 |
| Embroidery needle with ball point | straight | elongated straight | Ball | 22 | 76 | 0.94 |
| Embroidery needle with ball point | straight | elongated straight | Ball | 24 | 72 | 0.79 |
| Embroidery needle with ball point | straight | elongated straight | Ball | 25 | 44 | 0.7 |
| Embroidery needle with ball point | straight | elongated straight | Ball | 26 | 40 | 0.65 |
| Embroidery needle with ball point | straight | elongated straight | Ball | 27 | 37 | 0.6 |
| Embroidery needle with ball point | straight | elongated straight | Ball | 28 | 34 | 0.55 |